
Creamy Curd Recipe With Milk Powder for a Thick Texture
Making thick creamy curd at home can be easier with full cream milk, a little milk powder, fresh curd and the right setting temperature for a smooth texture.
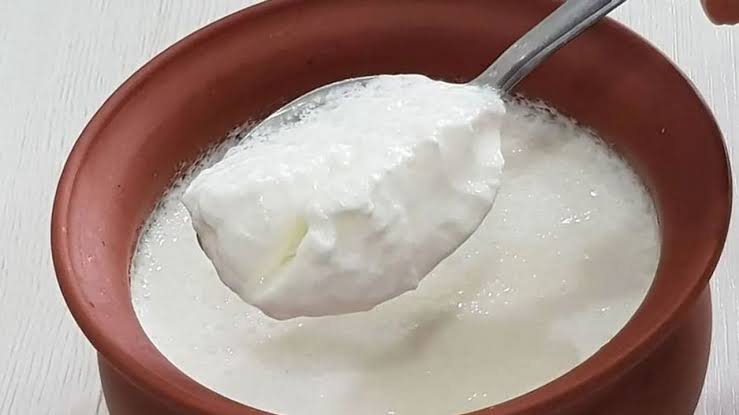
Homemade curd is a regular part of many Indian meals, but getting the same thick and creamy texture found in packaged products can sometimes be difficult. The curd may turn watery, remain loose or release too much liquid after setting.
The type of milk used can make a noticeable difference. Full cream milk generally contains more milk solids and fat than low fat milk, which can help produce a richer and thicker curd. The temperature of the milk and the setting time also matter.
A simple kitchen trick is to add a small quantity of milk powder before setting the curd. When mixed properly with warm milk, milk powder increases the amount of milk solids in the mixture and may help give the finished curd a firmer consistency.
To make this version, you need full cream milk, one to two teaspoons of milk powder and about one spoon of fresh curd. The quantity can be adjusted depending on how much curd you want to prepare.
Start by pouring the required amount of full cream milk into a clean vessel and bring it to a proper boil. Heating the milk thoroughly is an important part of the process and also helps prepare it for the setting stage.
Once the milk has boiled, allow it to cool. Do not add the starter while the milk is extremely hot, as excessive heat can affect the bacteria needed for fermentation. At the same time, the milk should not become completely cold.
The ideal stage is when the milk feels comfortably warm. At this point, add one to two teaspoons of milk powder. Stir continuously until the powder dissolves completely and there are no visible lumps.
Adding too much milk powder is not necessary. A small amount is enough to increase the milk solids without changing the basic character of the curd.
Next, add a spoonful of fresh curd to the warm milk. Mix it gently but thoroughly so that the starter spreads evenly throughout the milk. Using fresh curd with active cultures can help the fermentation process begin properly.
The vessel used for setting can also influence the final texture. If available, a clean earthen pot can be used. Traditional earthen pots are porous and may absorb some moisture, which can contribute to a thicker texture.
Pour the prepared milk into the pot, cover it and keep it in a warm place where it will not be disturbed. During colder weather, the vessel can be wrapped in a clean thick cloth to help retain warmth for longer.
The setting period usually takes around six to eight hours, although the exact time depends on room temperature. In warmer conditions, the curd may set sooner, while cooler weather can require more time.
Avoid repeatedly moving or opening the container while the curd is setting. Disturbing it too much can affect the final structure and prevent it from forming a smooth, firm layer.
Once the curd has properly set, place it in the refrigerator for one to two hours. Chilling allows the curd to become firmer and helps it hold its shape better when served.
There is no need to use complicated ingredients or special equipment for this method. The main points are choosing suitable milk, allowing it to cool to the right temperature, using a fresh starter and giving the curd enough time to set without disturbance.
If the curd turns watery, the milk temperature, starter quantity, setting time and room temperature are some of the factors worth checking. The final result can also vary depending on the milk and starter used.
This homemade creamy curd can be served with rice, used alongside meals or included in recipes that require a thick curd base. For people who prefer a richer texture, the combination of full cream milk and a small amount of milk powder offers a simple option to try at home.